Flash! A Photo Challenge

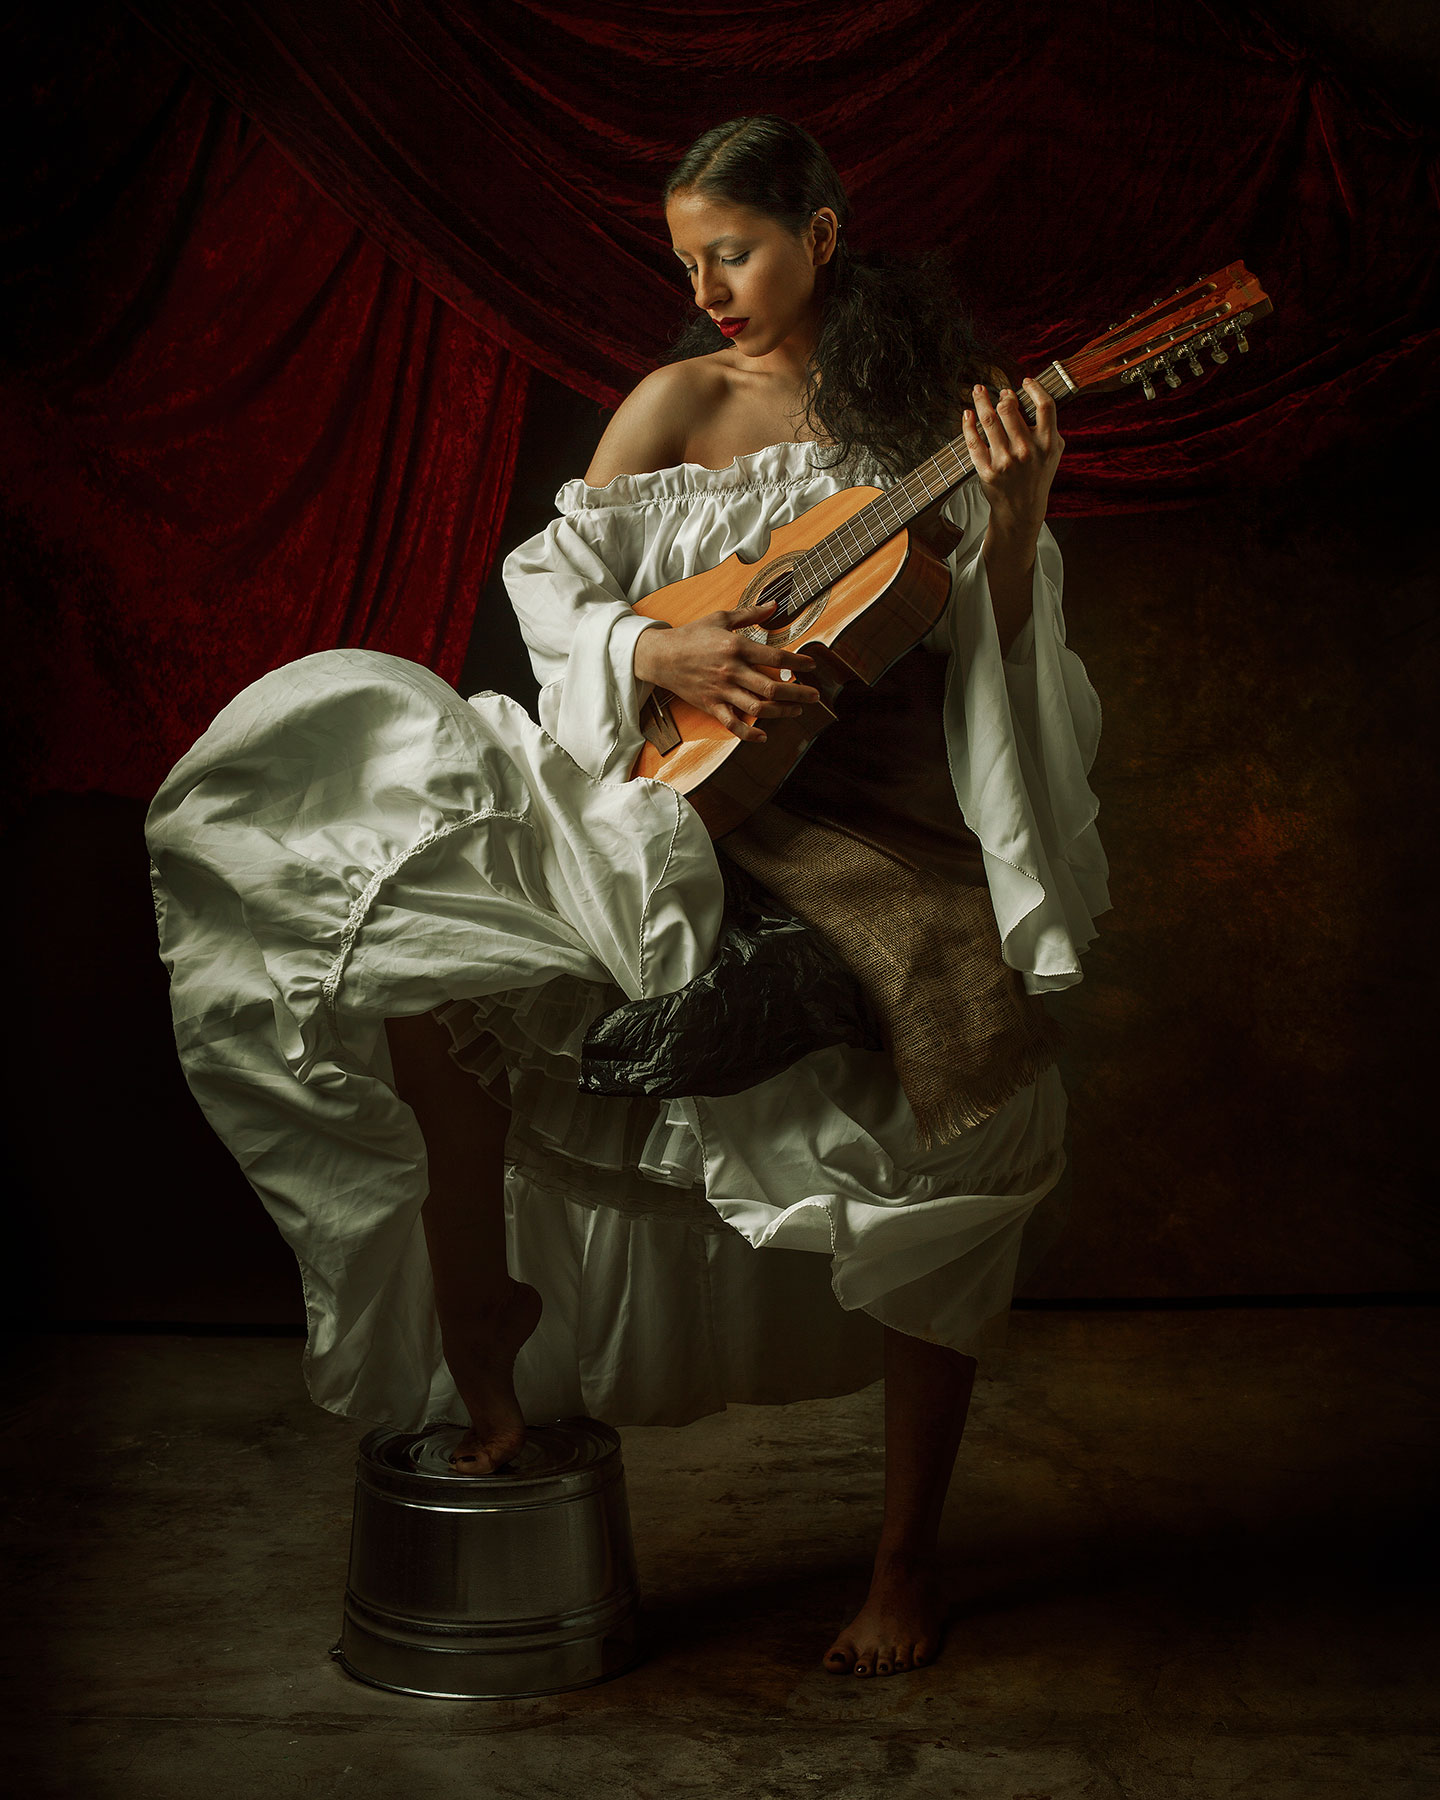
A few weeks ago I took part is a fun play day at my favorite Portland studios, Cobalt Studios PDX. They brought together 5 creative Portland area photographers (Tom, Marina, Olga, Aria, and myself) and gave us each one hour to create a show-stopping image with a mystery model, mystery hair & makeup styling, & five mystery props. There was no real way to prep for this, and I tried to go into the event with as little on my mind as possible.Upon walking into the studio I still wasn't remotely prepared for the assortment of random they had for us to choose from: a random piece of fabric, a scrap of leather, something metal, a garbage bag, and something to represent Puerto Rico on behalf of our Puerto Rican model, Karla.There was a lot of blank staring into the prop boxes. Followed by some cursing and more blank staring. I asked hair & makeup (Renee & Angela) to start on a nude eye and a bold dark lip--one of my favorite combinations, it can go a lot of different directions.My initial idea was to go for a more abstract beauty direction and play up metallics, silver fabric, silver pleather, etc., but tying in the Puerto Rican options just wasn't speaking to me. Then the inspiration hit; I put everything back, started from scratch, and decided to create a more classical painting inspired image, with a piece of burlap, some brown leather, a metal bucket/washbin, and a guitar....and I guess I'd figure out what to with a garbage bag at some point.I did bring my emergency photo go-bag, which includes some random makeup, a flowy dress, mirrors, a prism, and some fabric that I often poin together as DIY wardrobe. I paired the flowy dress with a petticoat the model had brought, then styled the fabric, leather, and garbage bag as a layered sash around the waist to add more textural interest. I set my partner Josh to draping some of the fabric in front of a painted grey canvas backdrop. He used various lightstands and clamps to make the magic. I was so focused on my time constraints that I didn't get a good pull-back shot, but here's a behind-the-scenes look with the staging visible.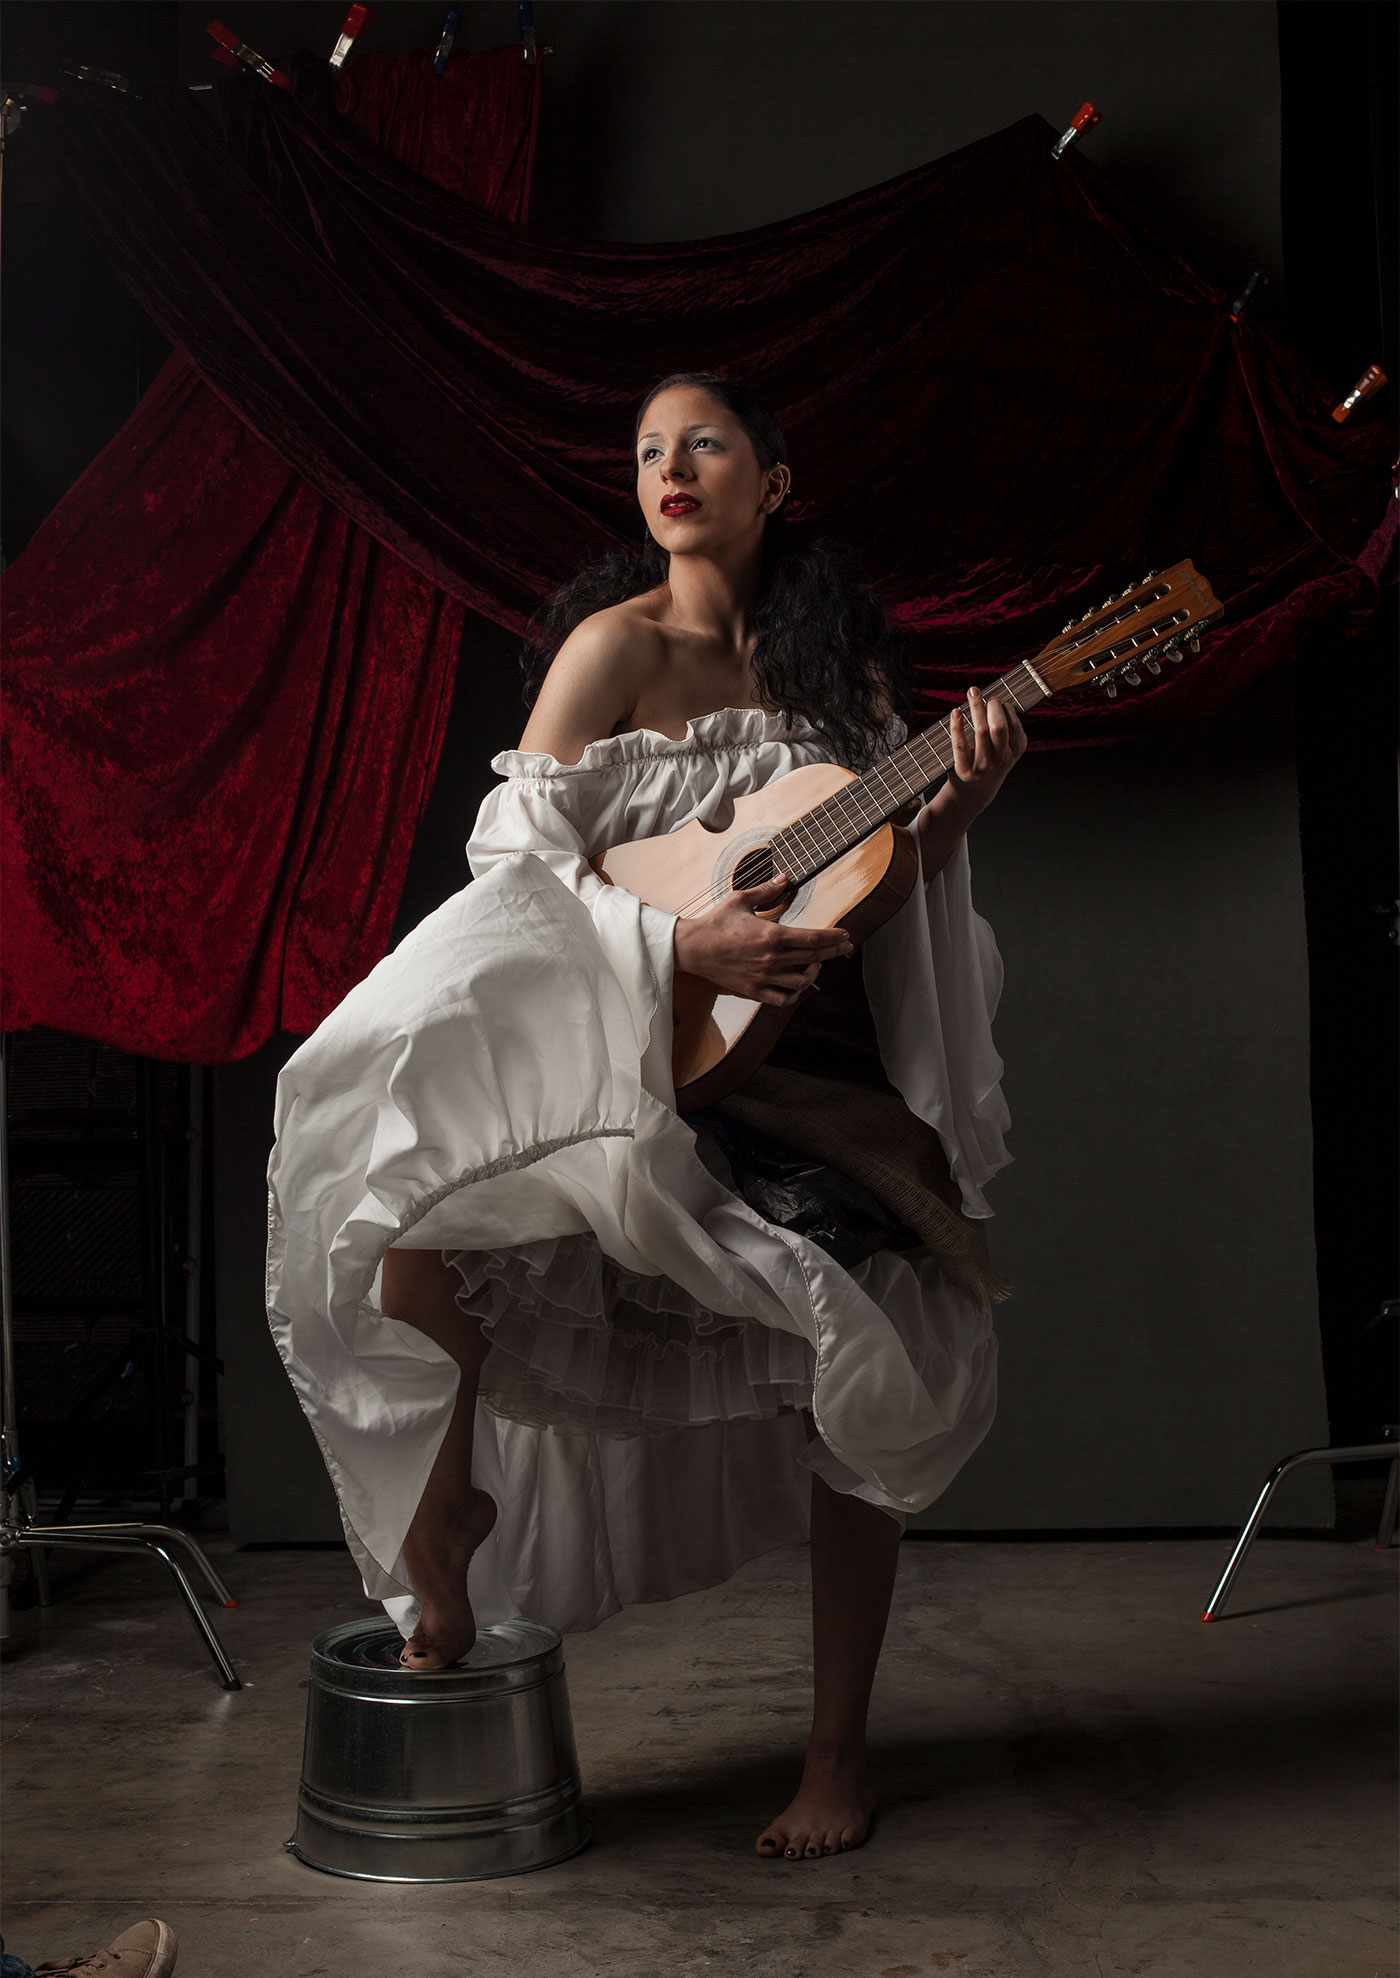 Most "old masters" style paintings (think Vermeer, Da Vinci, Rubens) utilize one large light source on their subjects, and that was the vibe I wanted to capture with this image. I really love the shaping of the face from (more painting inspiration) Rembrandt style lighting , but still wanted it soft, so a great big parabolic softbox feathered across the model was the way to go. If you aren't familiar with feathering, it's the technique of lighting not with the center of your light source but with the edge, softening your highlights & shadows. Because Karla's hair & the backdrop were so dark, I also wanted to add just a TINY bit of fill to save some detail on that side with the addition of a large reflector.
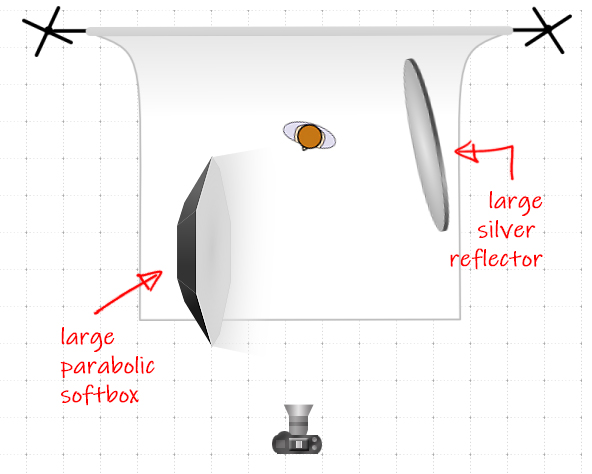 Again, we had only one hour to churn out a finished image, so I didn't spend much time shooting, only capturing 11 frames (and got called out for chimping, but hey, I wanted to be sure we got it and were done). Then it was time for post-processing!I prepped my image in Adobe Camera Raw bringing up the clarity & shadows just barely, and desaturating the oranges in the skin. I had about 20 minutes to create my final edited image, so first things first was cleaning up the image, getting rid of the light stands and other random elements in the background, basic skin clean up, then on to color grading. Because of the time crunch I DID use an action as the base for my color, but then made more adjustments to the tonality, color balance, and saturation (especially of the reds & oranges), as well as more detailed dodging and burning to emphasize the textural details in the fabrics and clean up the face a tiny bit more.
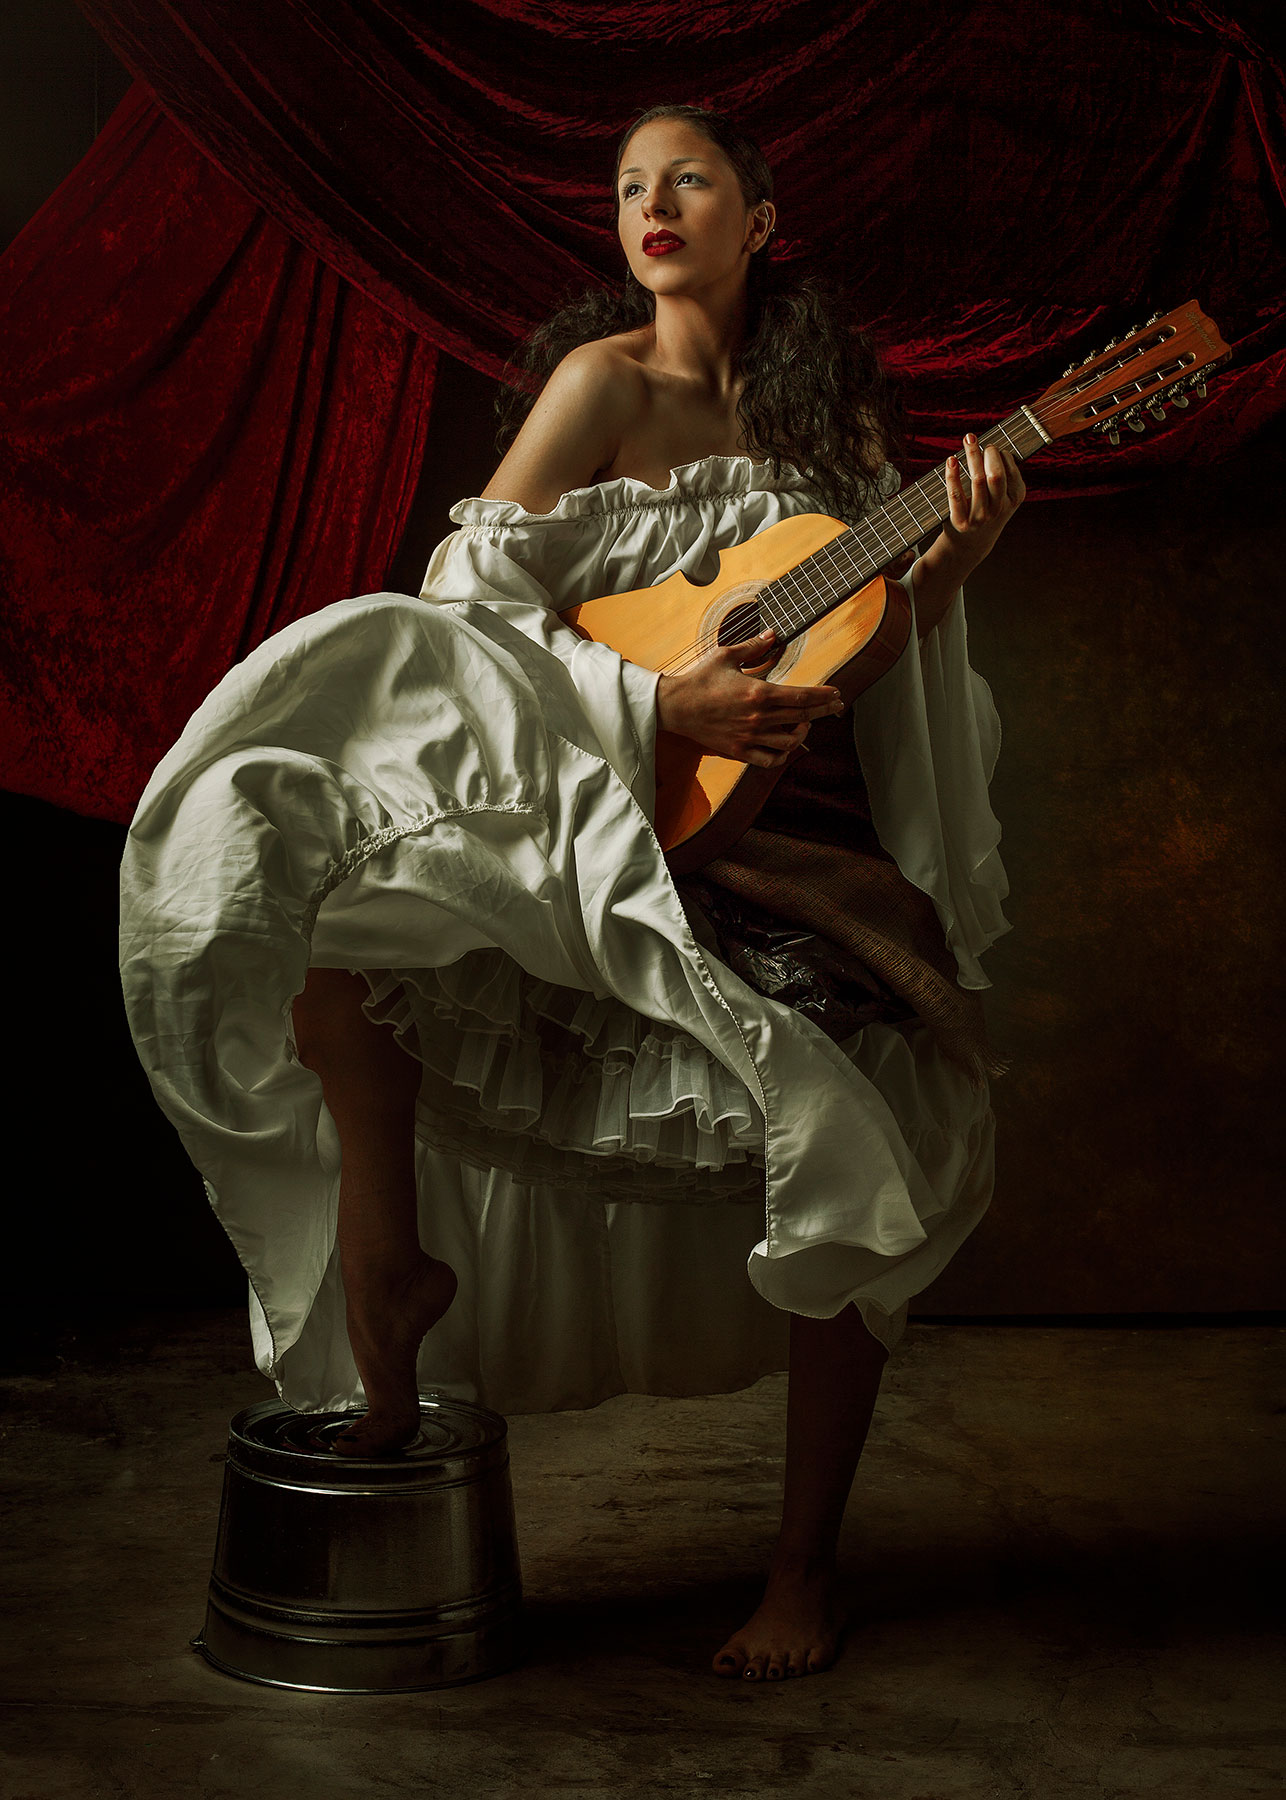
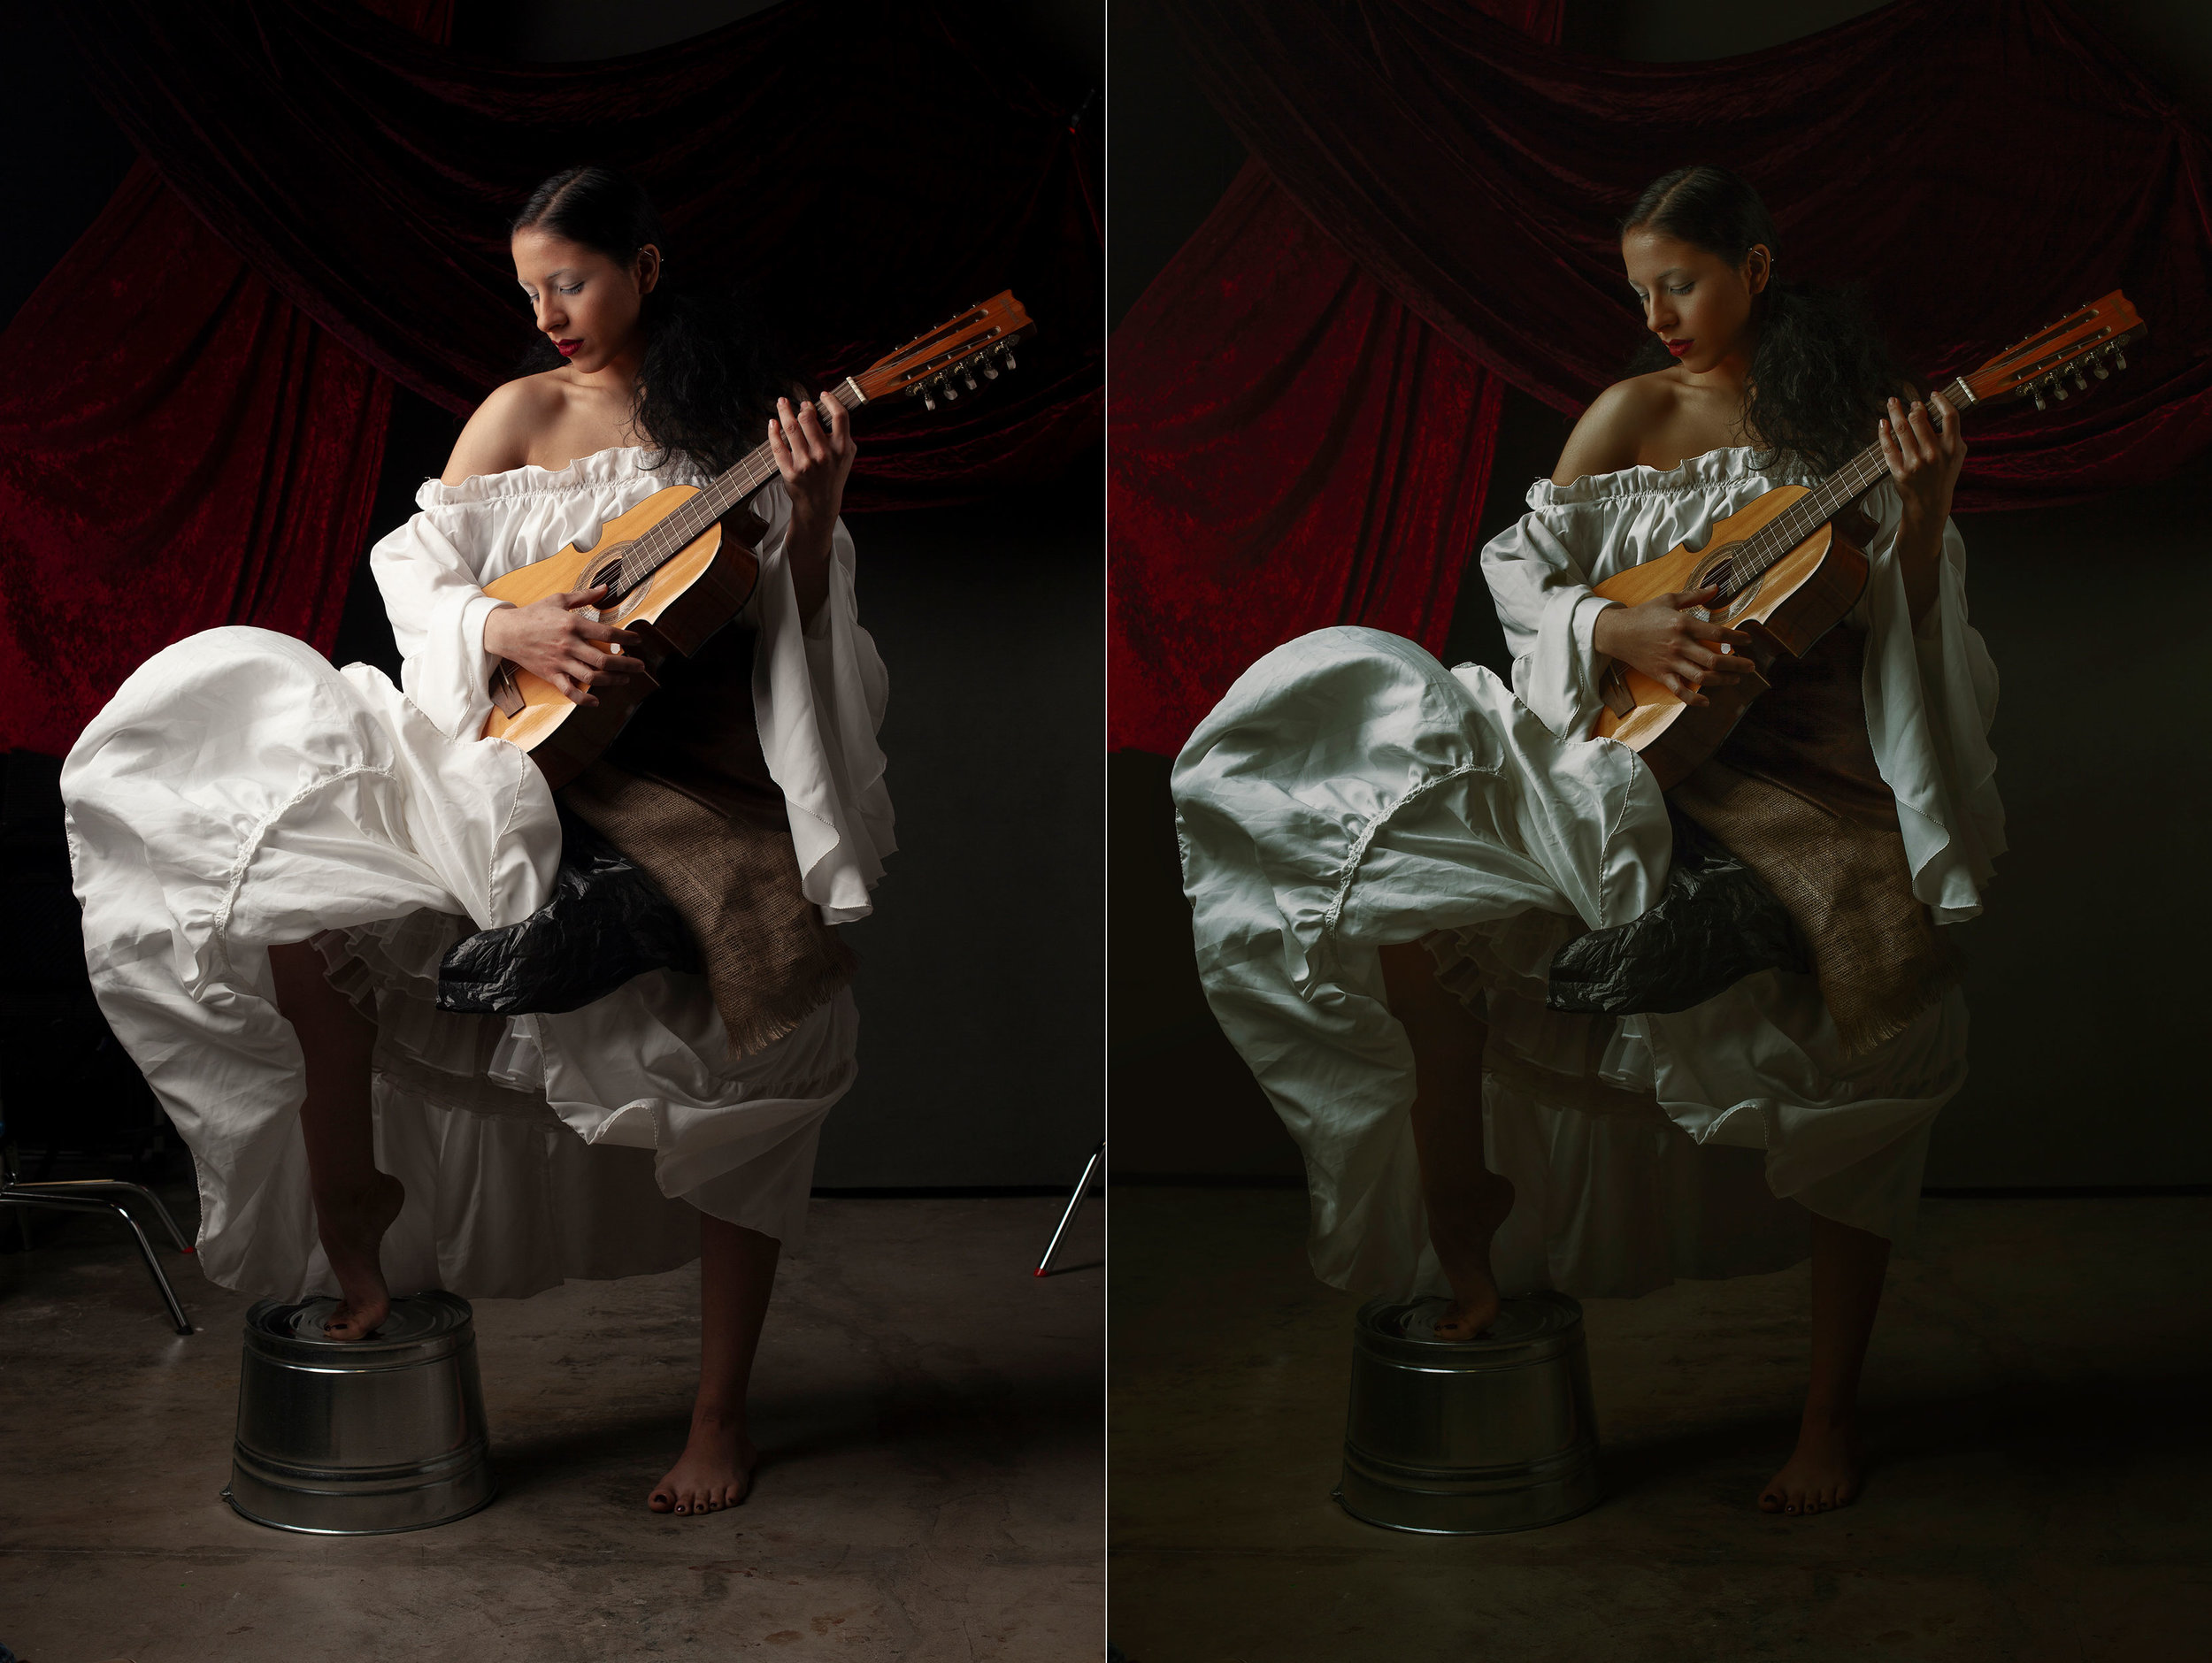 Now, noob mistake: I was editing on a brand new laptop that I hadn't calibrated yet, so my screen was brighter and more contrasted than the actual image; all in all, I was pretty happy with the outcome, but upon seeing the image not longer on my funky laptop screen I felt that the editing was a little muddy, especially in the shadows & skin tones.Having a live critique and judging was a new experience for me, and their input mirrored much of my own personal critique (highly recommend having peer reviews like this, even without the pressure of being judged in front of a live audience). The studio audience elected me for People's Choice (and Tom Lupton took home Judge's Choice), awarding us with 2 shiny trophies to add to our camera cabinets. It was such a joy knowing that my frantic planning and shooting was educational to those that came to the event; watching other photographers work can be kind of surreal and kick you out of your comfort zone and workflow in the best of ways.Once back at my home work-station I re-approached the editing from scratch, and manually put together a much cleaner & finessed look.
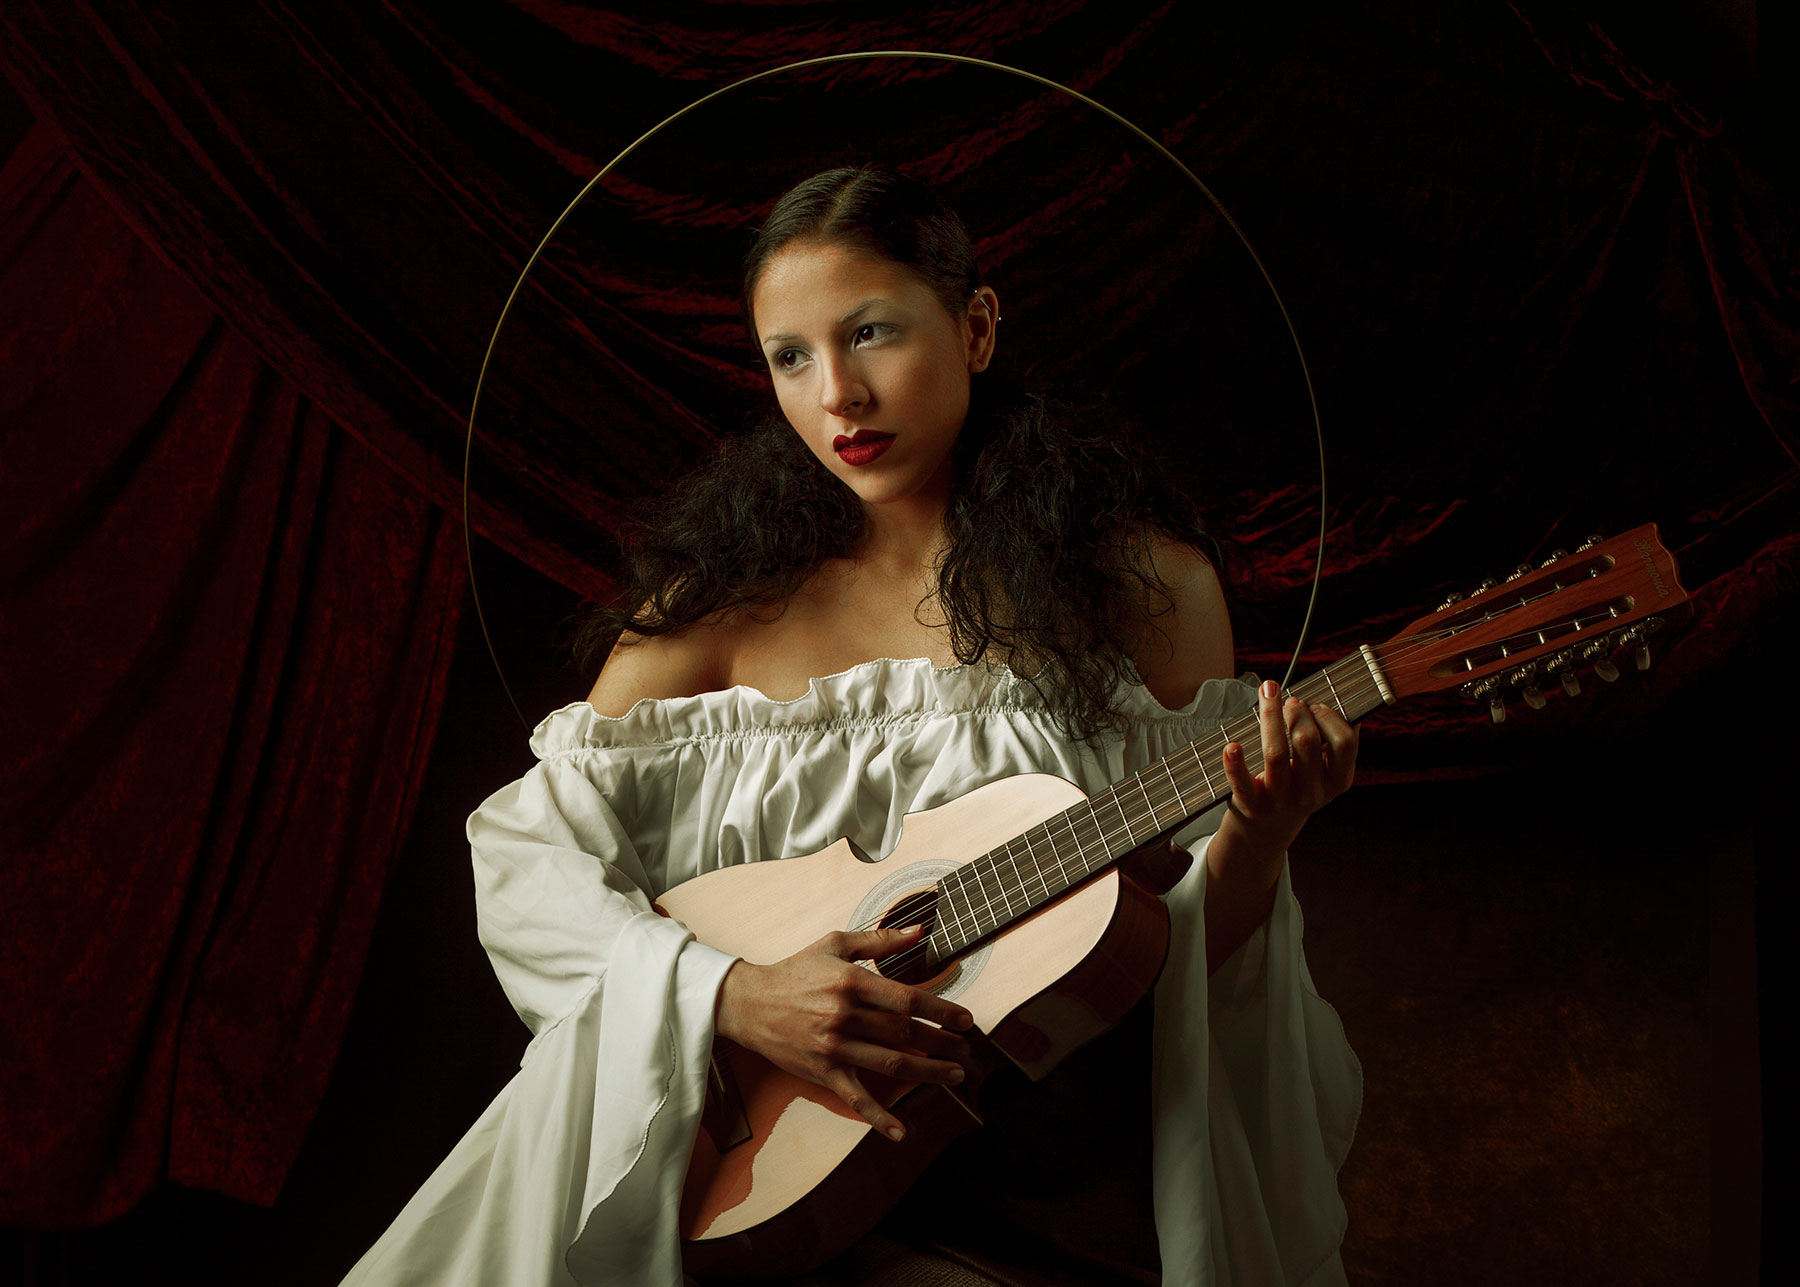
 And since I'm having fun with this set, if you're liking this refined renaissance palette, I created a Photoshop LUT (color lookup table) for you to download by clicking right here.You can see the other photographers' creations from the event on Cobalt's Facebook page (click!).