In the Air Tonight: Creating Atmosphere with Photoshop Brushes
We've been having small flurries of snow the last few weeks and it's put me in the mood for storms and fur, so I dug around in the archives for some dramatic chilly images, turned on a Game of Thrones marathon, and decided that winter was coming to Photoshop through the use of Photoshop Brushes.

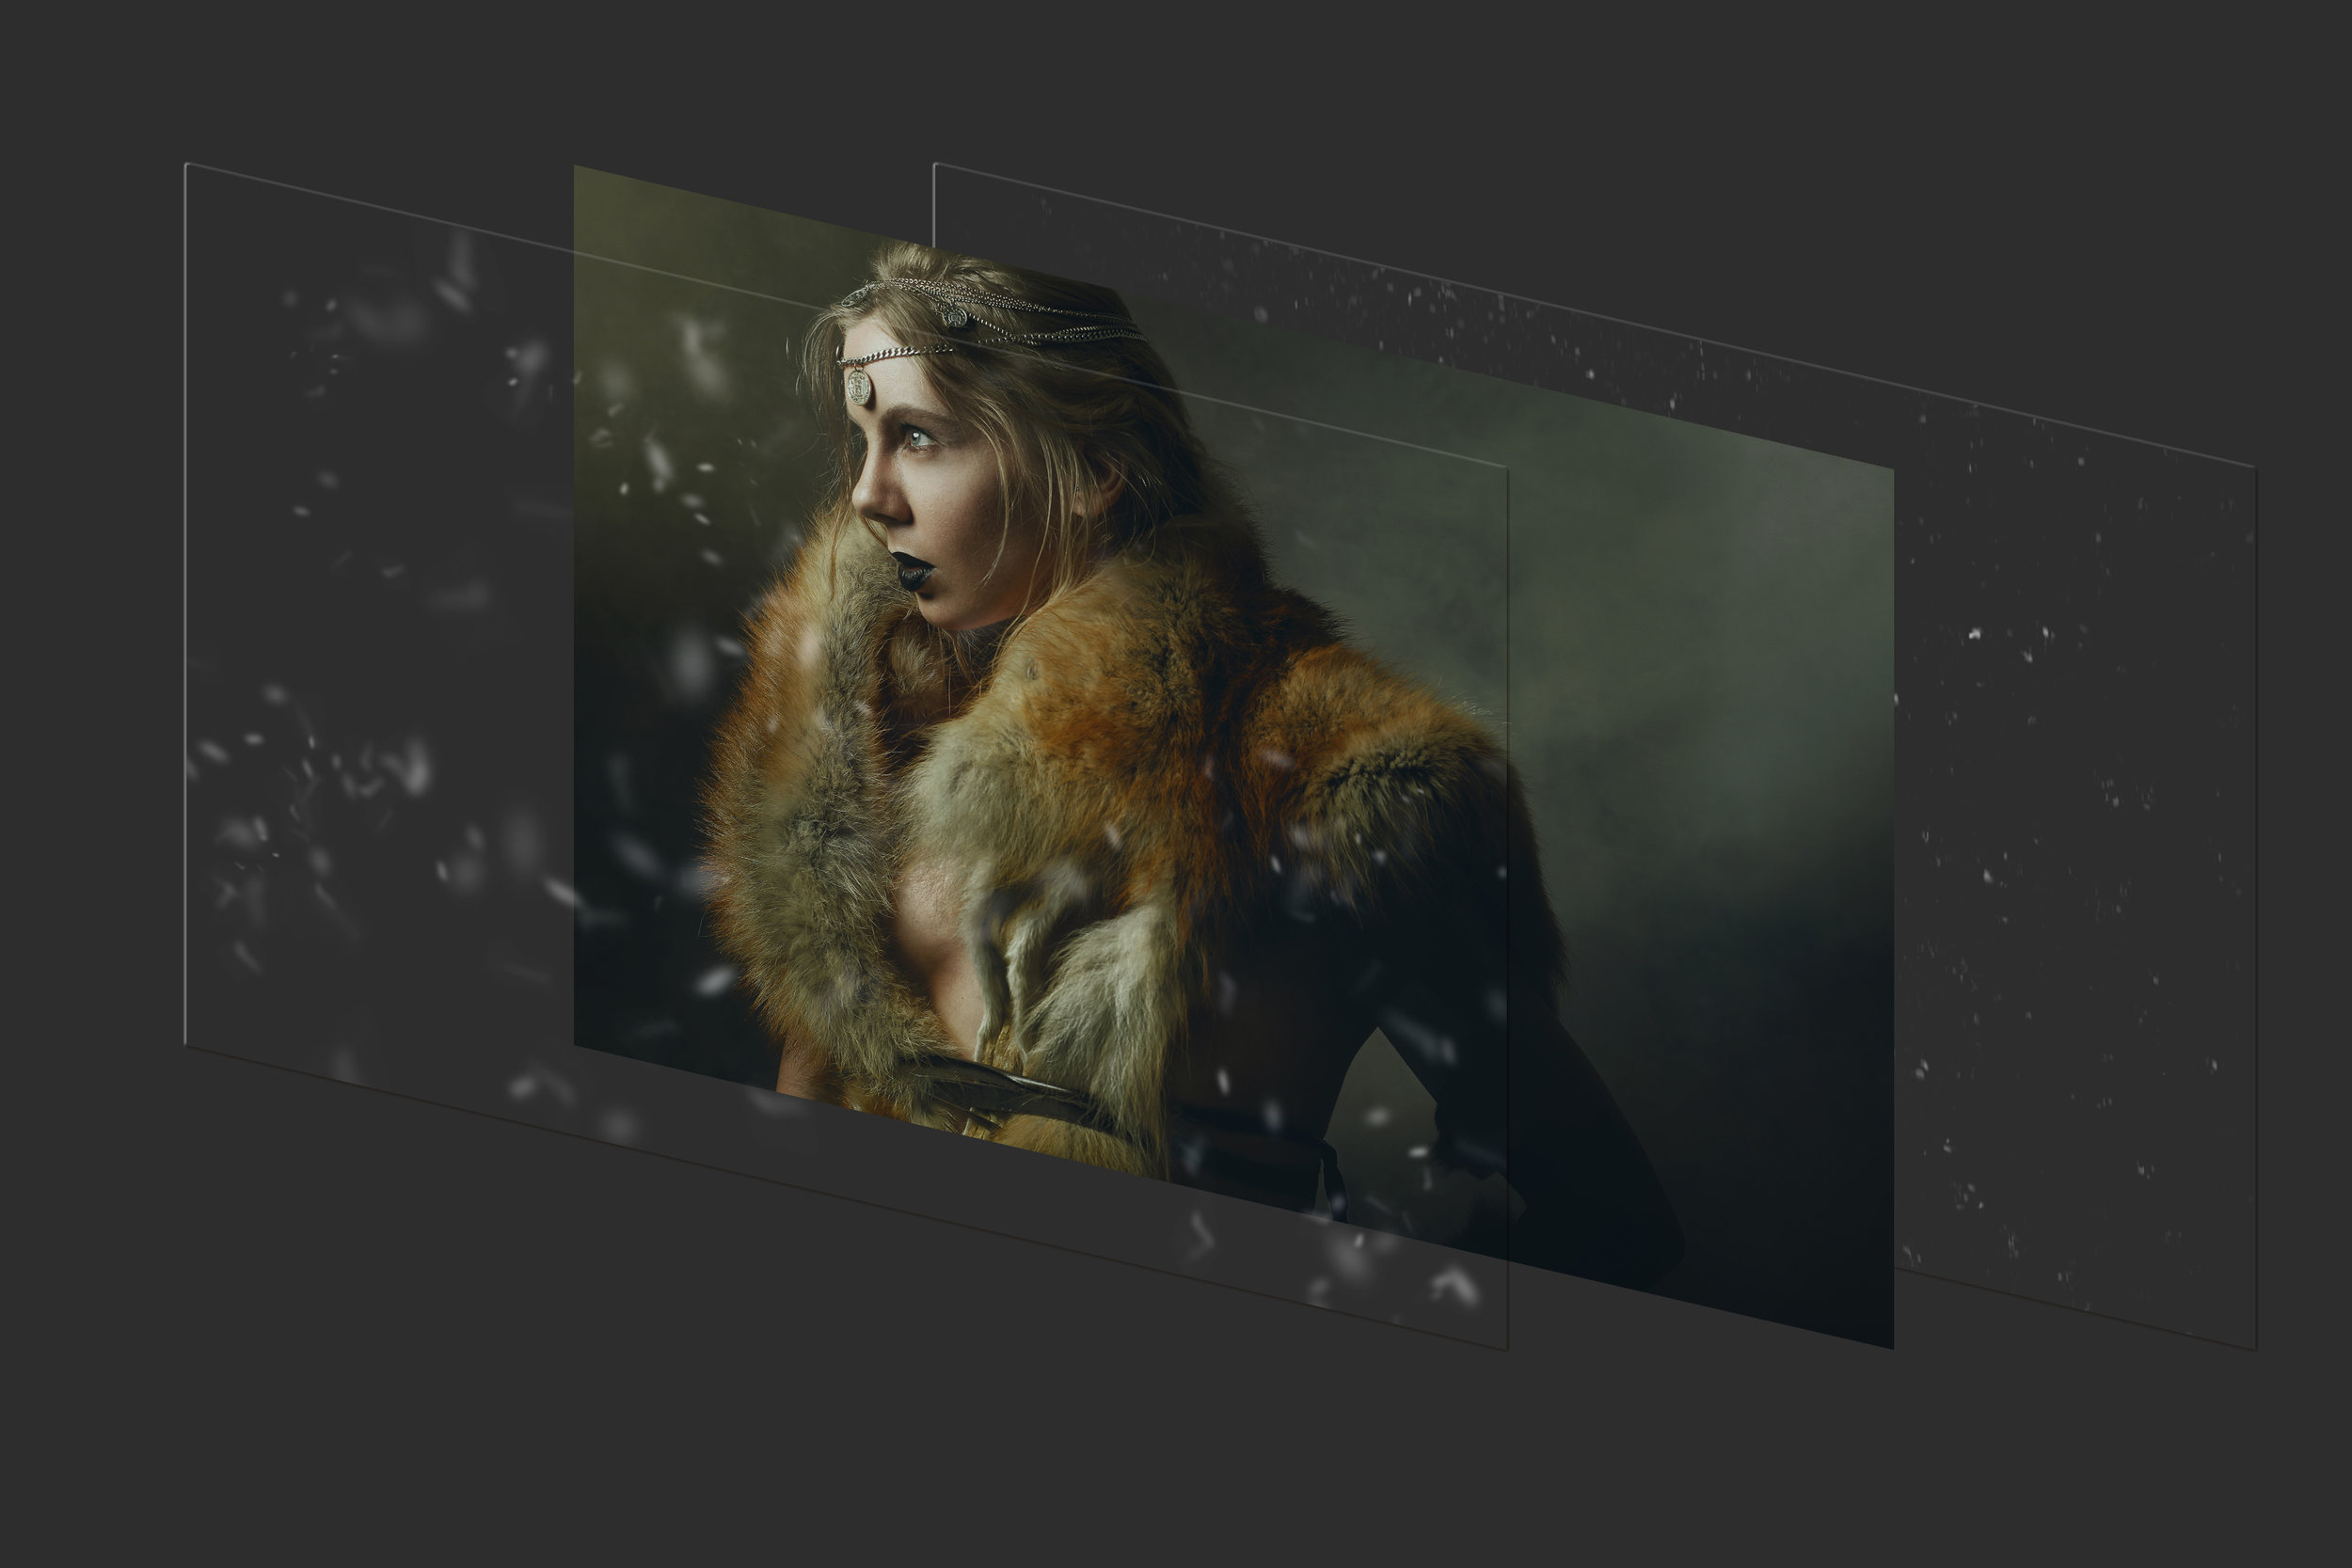
I like this image on its own; it's strong, the colors are beautiful, it creates a mood, but I still felt that it needed a touch more atmosphere to give it some context beyond "pretty Viking-ish lady stands in studio & stares dramatically", and used some creatively shaped Photoshop brushes to paint snow swirling around our subject.

The additions of snowflakes, rain drops, or other floating things--even just a small amount--can have a big impact on your image. These effects are created easily enough in camera if you can shoot in a storm, use a grinder to throw sparks everywhere, or flap an old rug around for some atmospheric dust, but that isn't always feasible or functional. Having debris or other objects in the air creates motion, depth, and ambiance to make your image more immersive for the viewer. A common technique for building up these atmospheric effects are the use of Overlays, or images specifically created to lay over your your subject in Photoshop. While this technique can be incredibly powerful, it doesn't always have the amount of control needed for the most realistic impact; you want random elements but also management of where those random elements are going. One important aspect that is lost in the use of most pre-made overlays is the creation of depth. The air is not a flat surface, and the things in it wouldn't behave as if it were. Painting different layers of airborne particles in specific areas with Photoshop brushes really brings this 3D aspect to your image.
Illustrated separation of layers in Photoshop. Click to enlarge.
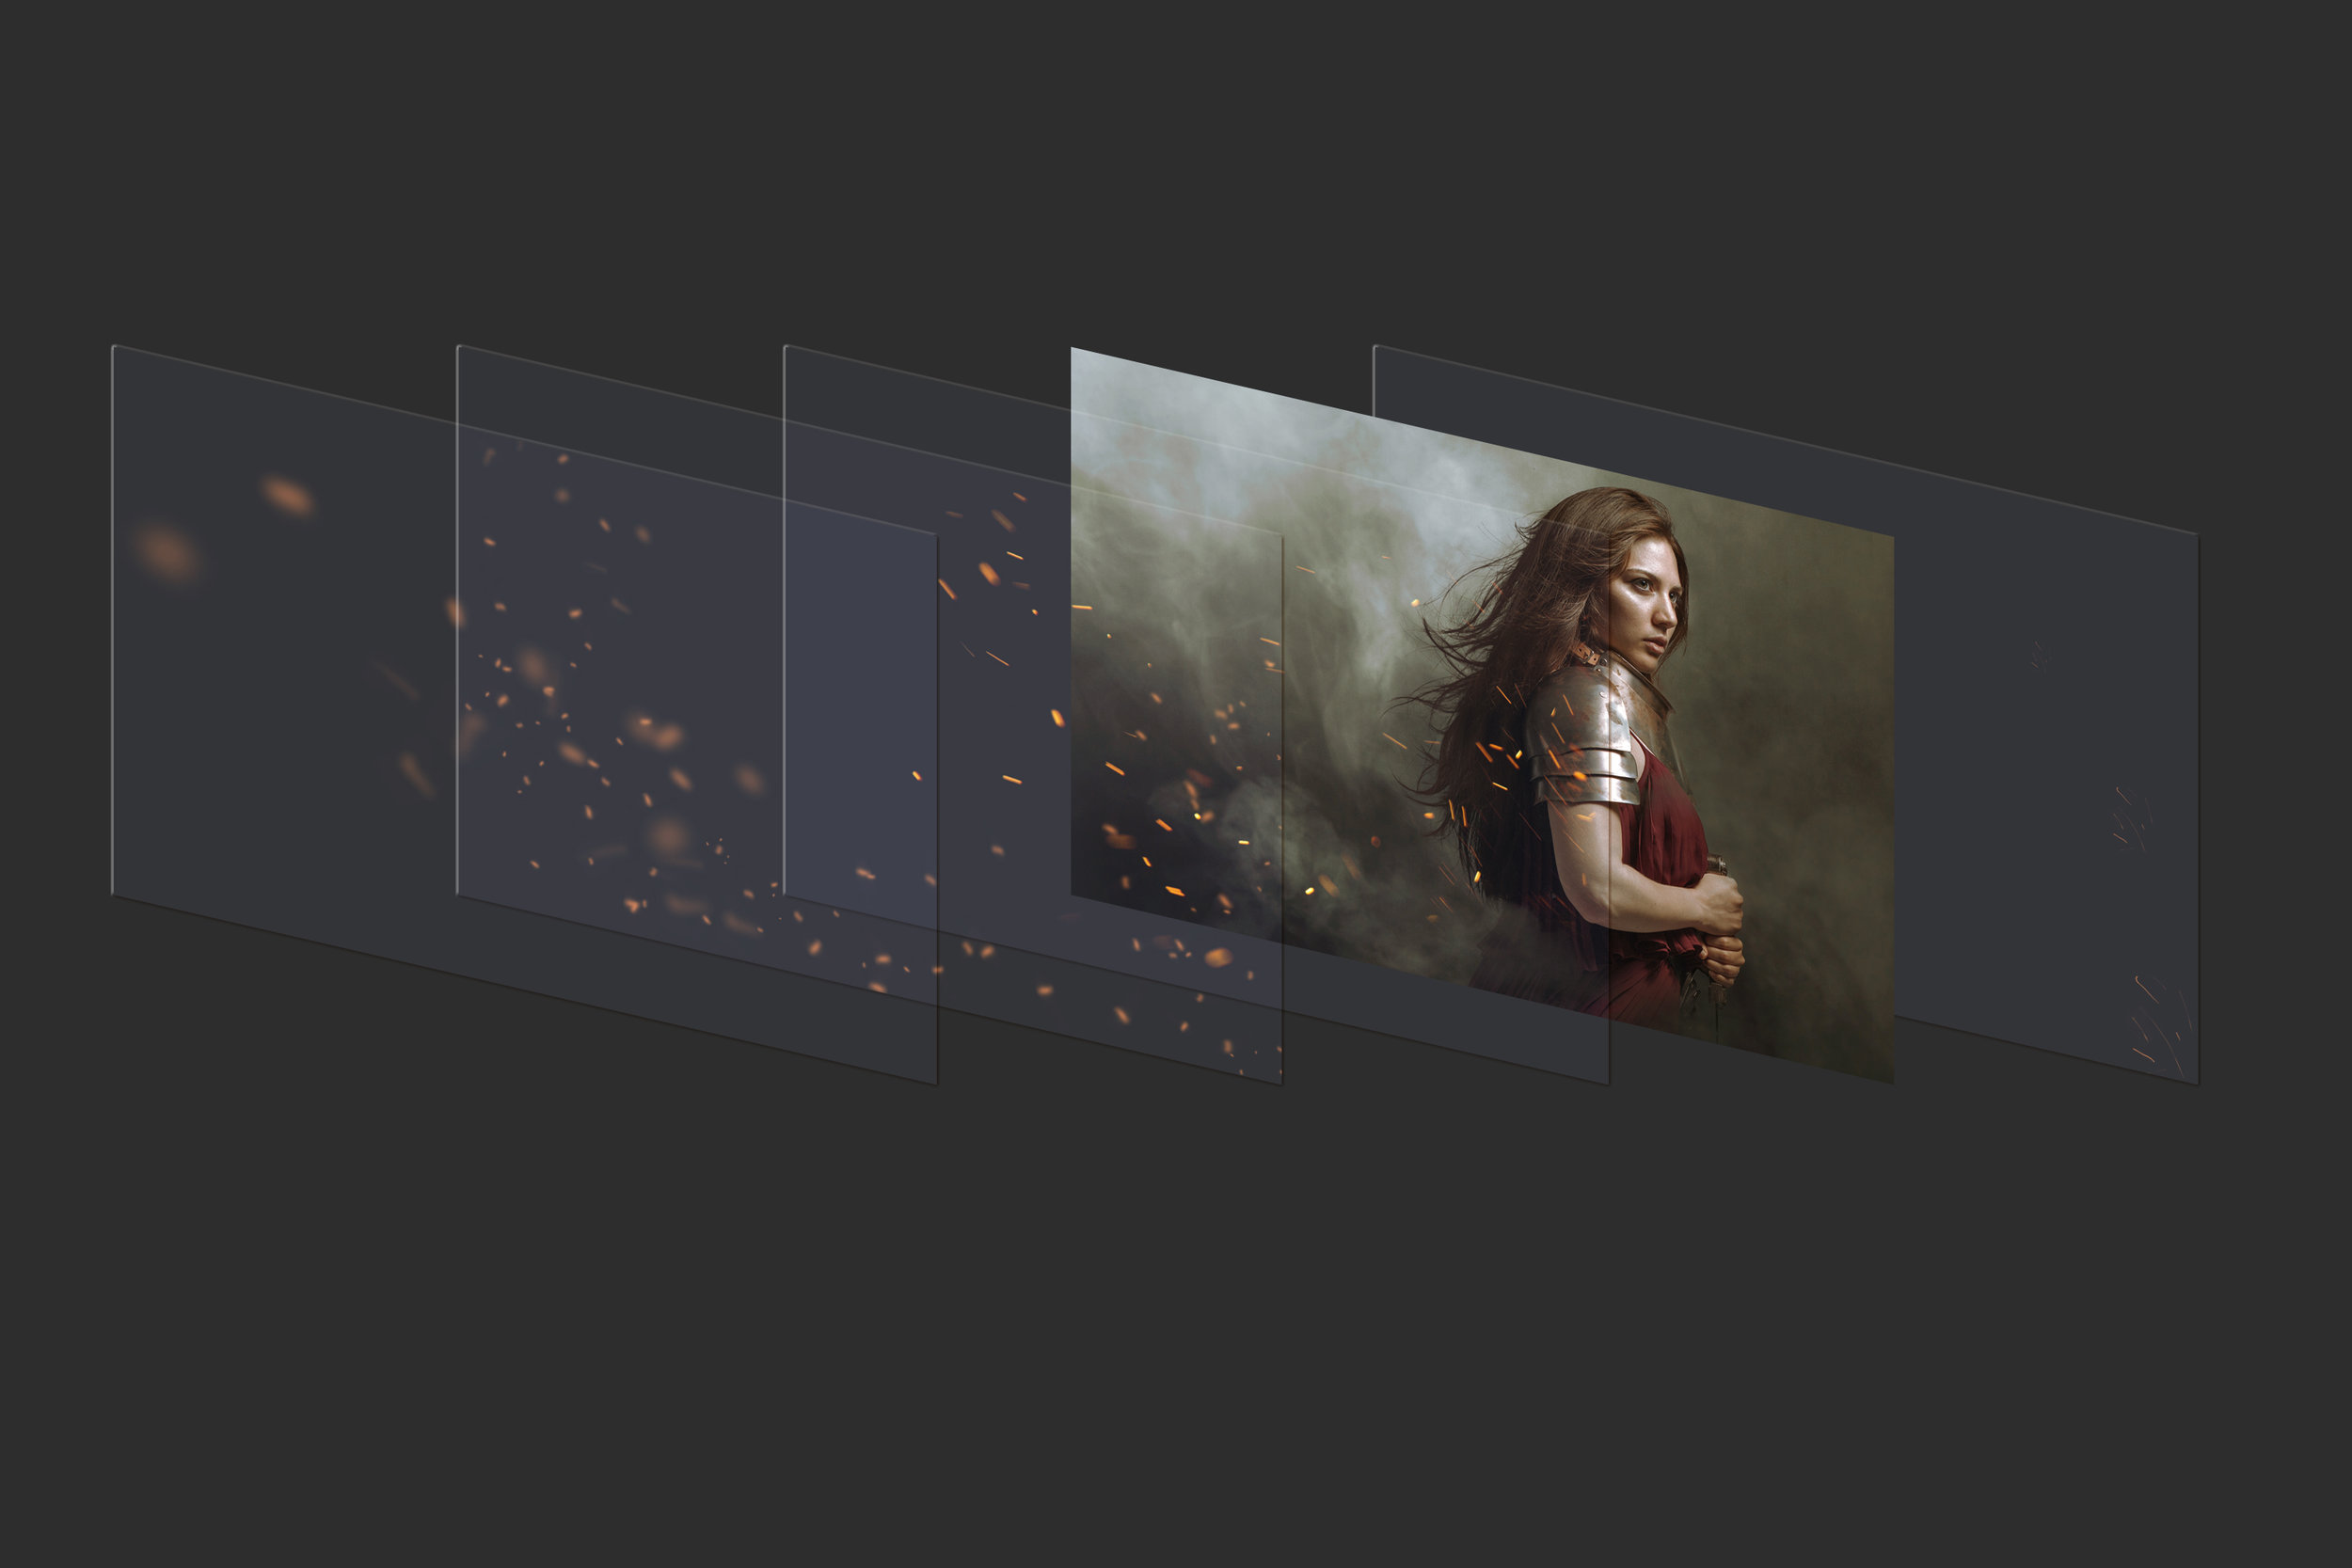
A basic understanding of how Depth of Field works is key to achieving this. Particles closest to your subject (assuming they are the focal point) and in the plane of focus will be in proportion and sharp, particles further behind the subject will be smaller and less in focus, and in front of the subject the particles will look larger & less in focus the closer you get to the lens/viewer.

Consider how your image was shot & is being composed; an intimate close-up will have a more shallow DOF than a a wide environmental scene, and airborne elements will look very different between them.
Ok, so HOW do you do this. First off, you're going to need some Photoshop brushes. You can create your own, or there are countless ones available online for free or for purchase (Google: dust photoshop brushes, sparks, rain, leaves, etc. etc.), but here are a few of my favorites:
Dust Brushes | Particle Brushes | Concept Art Brushes
For demonstration purposes, I'm using just the brushes on a blank canvas (you can click the screenshot to enlarge it). If you aren't familiar with using PS brushes, there are a LOT of options, and you can control these through the Brush Settings panel menu (Window>>Brush Settings). You can load new brushes either through File>>Open>>opening the .ABR file, or through the panel by clicking the 4 lines in the upper right>>Presets Manager>>Load.

The initial options allow you to select which brush shape you want to use, the size, angle, roundness, hardness, and spacing between brush marks. It will also display a small preview of how the brush will behave. Many custom brushes will have preset options already, but they can always be adjusted. I selected a particle brush with an assortment of specks, but you can see below that painting with it alone doesn't look like much.

By widening the spacing between the brush marks within the stroke you can better see the detail within the brush, but it still doesn't look natural.

So, let's randomize a little more. On the left of the Brush Settings menu select Shape Dynamics. These options create variation in each brush mark. Size Jitter changes the diameter of each brush mark, creating a variety of sizes as you paint. Adjusting the Angle Jitter lends itself to the effect as well. However this still keeps the brush stroke in a relatively confined line.

To break that straight line click on Scattering on the left side of the menu. This allows you to change the placement and distance of your brush marks along the path of the stroke (scattering them). You can scatter them to the sides your brush stroke only, or if you select Both Axes it will scatter more universally, up, down, side to side, etc. The Count option gives control over how many brush marks are made at a time. Now we have a much more natural and random looking brush, allowing us to control where the particles will be by following the stroke of the brush while still giving them a randomized look.

To show this in action I created 2 blank layers, one with a stroke across the canvas with a smaller size of the dust brush and another identical stroke with a larger size of the same brush.

The difference in size & randomized controls is beginning to create depth already, but this can be emphasized even further with Blur Effects (while not used here, Gaussian Blur is my go-to for a more stable blurred look). There are a TON of different options, but to inspire motion I like to use Radial Blur to create the feeling of the particles rushing past us. I applied this only to the layer with the larger particles.

For good measure I'm going to create a 3rd blank layer and use an even LARGER version of the brush for one more added layer of depth, as if the particles were right in front of the lens.

Combining these techniques with Photoshop brushes will help you build depth, action, and atmosphere in your images whether it's an overall effect or in a concentrated area in front of or behind your subject. This can be applied to anything from exploding debris to flying insects, and every kind of fluff in between. Happy painting!