Pop Highlights in Photoshop, Vol. 1

Good lighting should always be part of the foundation of any portrait, but sometimes you just want more. Utilizing blending options is one technique I like to use to emphasize and pop highlights in Photoshop. This example already has some distinct highlights to begin with, but I wanted to exaggerate them for impact. 1. I recommend using this technique after you're completed your retouching, as it will pick up on and highlight all the little things you may wish to remove. Make a copy of your original image (do this by either dragging the layer to the New Layer icon on the Layer Panel, or but hitting Ctrl + J) and set the Blending Mode at the top of the Layer Panel to Screen. This will effectively lighten the entire image by brightening all pixels that are not black, but that's not what we want for our final product!
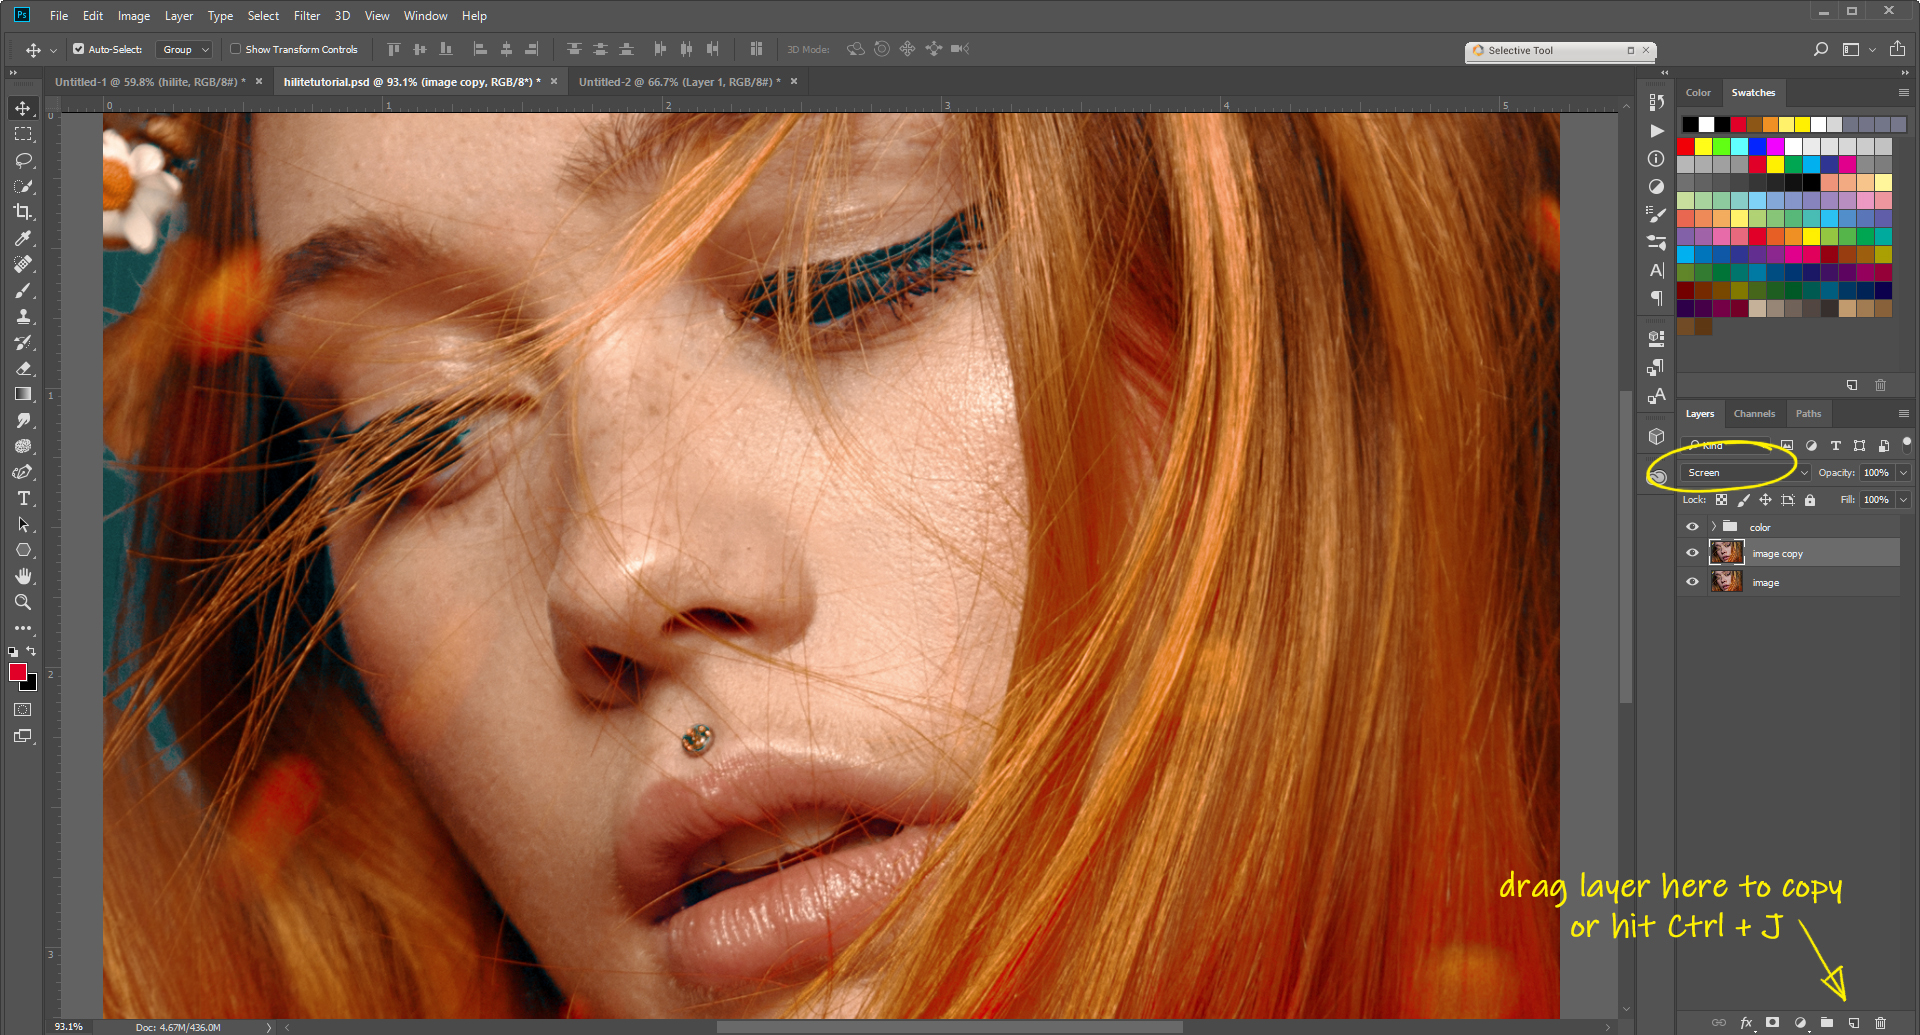 2. Now, to narrow down the Screen effect to just the highlights. Double click on the Screen layer you just created to open the Layer Style window. We'll be working with the Blending Options which should be what appears as soon as the window opens. These options allow you to control the visibility of your Layer in a variety of ways and control how it interacts with the Layers below it. Towards the bottom of the window you'll see an option for Blend If: Underlying Layer; this controls which tones in the underlying layer that the current layer will cover. We only want to boost the highlights, so we are going to limit the tonal range of the Underlying Layer to the highlighted areas only.Both the black slider and the white slider have 2 halves; you can separate them by clicking and dragging the slider while holding Alt. I prefer to drag half the black slider all the way to white end of the gradient for the most gentle and natural looking transition (in the screenshot it becomes hidden behind the white slider, but it's there!). Then drag the remaining half of the slider up towards the highlights until only the bright tones you'd like to be emphasized are effected.
 3. I wanted to pop highlights in the more shadowed part of the face a little differently. So, I made another copy, this time of the Screen/Highlight layer. I then added a Layer Mask to show only the darker side of the face (mask shown in red for emphasis).
 Double click on the 2nd Screen layer to open its Layer Style window. Because this part of the face is darker we need to expand the tonal range by dragging the half of the slider further into the midtones.
 4. We're going to repeat the process to highlight the hair. Copy the Screen layer again & mask off all but the hair. Then because the hair is darker still than the face, expand the tonal range in the Layer Style options further into the shadows.
 5. The highlights are looking pretty well-tuned all around, but I want them to be even more dramatic. More copying layers! I added another exact duplicate layer of the darkened side of the face, and then another of the first Screen layer, but with a lowered opacity (48%).
 Below you have a finished before and after view of the popped highlights! This technique can work really well in a variety of circumstances, whether it's to pop highlights on skin like this example, emphasizing rim light, or even controlling the color of highlights and shadows in a more manual way. Happy highlighting!